How to write a design brief: A 2026 guide to clear goals and creative direction
At its heart, writing a design brief is about one thing: getting all your project's crucial details down on paper. It’s your strategic blueprint, a single document that clearly lays out your goals, scope, audience, and constraints. This is what you’ll hand to your design partner to make sure everyone is on the same page before a single pixel is pushed.
Why Your Project's Success Starts with a Great Design Brief
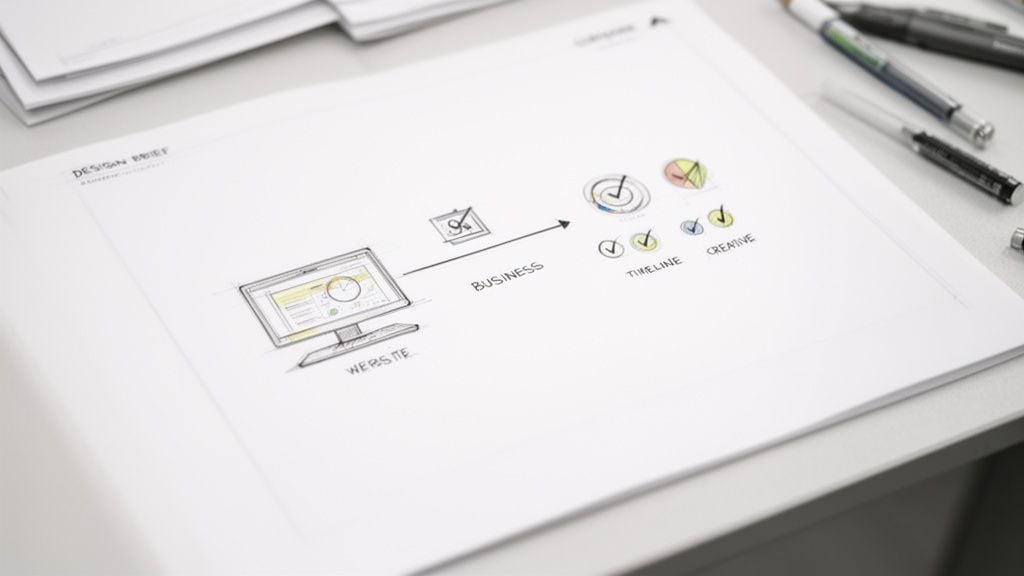
You wouldn't build a house without a blueprint, and the same principle applies here. A great design brief isn't just admin; it’s the plan that connects your business goals to the creative work. It ensures the final output, whether that's a new website or a complete rebrand, actually captures what you set out to achieve.
Think of it as the foundation that keeps your project on track. I’ve seen countless projects stumble because of a weak or non-existent brief, leading to endless revisions, blown budgets, and a final product that just misses the mark.
A Single Source of Truth
From kickoff to launch, the brief serves as the project's single source of truth. It protects both you and your agency by setting clear, agreed-upon expectations from day one. When you get this right, you sidestep the most common headaches.
Here’s an actionable checklist to make sure your brief sets your project up for success:
- Clarify Goals Upfront: Define your primary objectives before any creative work begins to minimize costly back-and-forth revisions later.
- Translate Ideas into a Plan: Convert your abstract vision into a concrete plan that designers can execute effectively.
- Define Boundaries: Clearly outline deliverables and project scope to prevent scope creep from derailing your timeline and budget.
- Empower Your Designer: Provide the strategic insights your creative partner needs. Finding a website designer who understands your vision is much easier when you can hand them a detailed plan.
A design brief is your first and most important investment in a project. It’s the tool that bridges the gap between a business objective and a creative solution, turning abstract ideas into tangible results.
Bridging the Expectation Gap
This need for clarity is more important than ever. The Design Council's 2025/26 report uncovered a growing gap between what clients need and what creative teams can deliver. While 71% of UK designers expect demand for their skills to rise, a worrying 43% feel they lack the full capability to meet it.
This gap is often widened by vague or incomplete briefs that create mismatched expectations. For a small business, a detailed brief is the best way to close that gap, preventing the kind of scope creep and misunderstandings that can derail a project.
Ultimately, learning how to write a good design brief is a crucial business skill. It forces you to think deeply about what you want to accomplish, ensuring your investment pays off with a final product that not only looks fantastic but delivers real value.
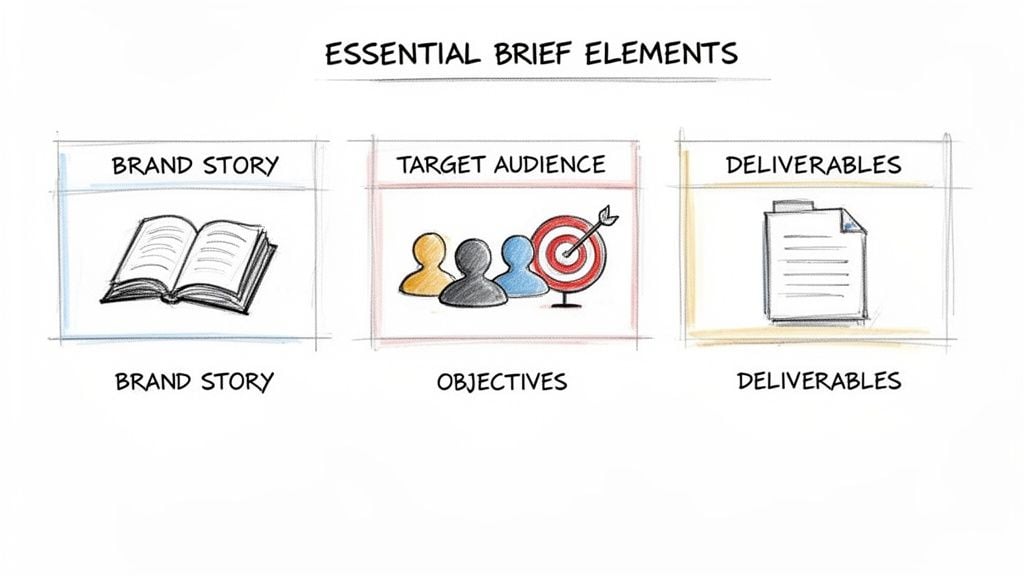
The Essential Elements of an Effective Design Brief
A great design brief isn't just a document; it's the foundation of a successful project. It’s what separates a project that hits the mark from one that falls flat. We're going to break down exactly what you need to include, turning what can feel like a huge task into a simple, practical checklist.
Think of it like giving directions. A vague "it's over there" won't get anyone to their destination. But clear, step-by-step instructions ensure your design partner arrives at the perfect solution for your business.
Company Background and Brand Story
Before any designer can start creating, they need to get to know you. What’s your story? What problem do you solve for your customers? More importantly, what are the values that drive your business?
This isn't the time for a corporate novel. A few sharp paragraphs are all it takes to give the creative team a real feel for your brand’s personality. This context is what allows them to produce work that feels genuinely yours.
For instance, a family-run bakery in Weymouth has a completely different vibe than a new software startup. Sharing that background helps a designer make informed choices on colours, fonts, and imagery that truly reflect who you are, steering clear of a generic, one-size-fits-all approach.
Pinpointing Your Project Objectives
What is the single most important thing you need this design to do? This is the "why" behind the entire project. Without clear goals, a design is just a pretty picture. With them, it becomes a hard-working business asset.
Your objectives need to be specific and, ideally, measurable. Don’t just say you want to "improve your online presence." That’s far too vague. Get right to the point.
Here’s what strong, actionable objectives look like:
- Increase online sales for our main products by 20% within six months of the new website going live.
- Generate 50 new qualified leads per month through a redesigned contact form and downloadable guide.
- Cut down on customer support tickets about order tracking by 30% by designing a more intuitive online system.
Clear goals give your design team a target. Every single decision, from a page layout to the wording on a button, will be measured against these objectives. This transforms the project from a purely creative exercise into a focused mission to deliver real business results.
Defining Your Target Audience
You can’t design something for someone you don’t understand. Honestly, this is one of the most vital parts of your brief. A design that tries to speak to everyone will ultimately connect with no one.
Go deeper than just basic demographics. You need to explore their values, frustrations, what motivates them, and how they live their lives. The clearer the picture you paint of your audience, the better equipped the designer is to create something that truly resonates.
A design brief that lacks a clear audience profile is like a ship without a rudder. It might look good, but it has no direction and is unlikely to reach its intended destination.
Take a local cafe as an example. Its audience isn't just "people who drink coffee." It’s likely a mix of very different groups:
- Busy Commuters: They need a lightning-fast mobile ordering experience to grab and go.
- Freelancers and Students: They’re looking for a cosy spot with reliable Wi-Fi and plenty of plug sockets.
- Weekend Tourists: They want a unique local experience and are easily swayed by beautiful photos and good online reviews.
By identifying these distinct groups, the designer immediately knows the website must be incredibly efficient for mobile users while also showcasing the cafe's atmosphere to draw in those looking to linger. That’s the kind of detail that separates good design from great design.
Outlining the Creative Direction
Here’s your chance to set the tone and guide the look and feel. You’re hiring an expert for a reason, so you want to leave them creative room, but a bit of direction is incredibly helpful.
One of the best ways to do this is by showing examples of what you love—and just as importantly, what you don't. Put together a small 'mood board' with links to other websites, logos, or brands. For each one, add a quick note explaining why you've included it. Is it the clean layout? The bold colour palette? The playful font?
Visuals often communicate more than words ever could. This gives the designer a direct peek into your personal taste and helps them avoid spending time on concepts that are destined to miss the mark. As you outline this direction, it's also wise to consider the fundamental principles of graphic design to ensure the final product is as effective as it is beautiful.
Listing Your Main Competitors
Understanding the competitive landscape is non-negotiable. Who are you up against, both in your local Dorset area and on a national scale? List 3-5 of your key competitors and take a moment to analyse what they’re doing from a design perspective.
For each competitor, ask yourself:
- What are they doing well? Is their website a breeze to use? Is their branding strong and memorable?
- Where are they falling short? Does their brand look dated? Is their message confusing?
This isn’t about copying anyone. It's about spotting gaps and opportunities. By understanding the visual norms in your market, your designer can make a strategic choice: either align with what customers expect or deliberately break the mould to make your brand stand out.
Putting It All Together
Learning how to write a good design brief is all about assembling these pieces into one coherent story. Each section builds on the last, giving your design team a complete roadmap. To help you gather all this information, we've put together a quick checklist.
Use this checklist to gather the essential information for your brief. Each section provides critical context for the design team.
Key Sections of a Powerful Design Brief
| Section | What to Include | Why It Matters |
|---|---|---|
| Company Background | Your mission, values, and a brief history of your business. | Provides the core identity and personality for the brand, ensuring the design feels authentic. |
| Project Objectives | Specific, measurable goals (e.g., increase leads by 25%). | Turns the design into a strategic tool focused on achieving tangible business results. |
| Target Audience | Detailed profiles of your ideal customers, including their needs and pain points. | Ensures the design resonates with the right people and addresses their specific motivations. |
| Creative Direction | Examples of designs you like/dislike, tone of voice, and desired aesthetic. | Gives the creative team a clear visual starting point and helps align the work with your taste. |
| Competitor Analysis | A list of key competitors and a brief analysis of their design strengths and weaknesses. | Helps identify opportunities to differentiate your brand and stand out in a crowded market. |
By taking the time to work through each of these sections, you’re not just writing a document—you're making a strategic investment in your project's success. That upfront clarity allows your design partner to skip the guesswork and get straight to what they do best: creating something exceptional that moves your business forward.
Defining Scope, Deliverables, and Success Metrics
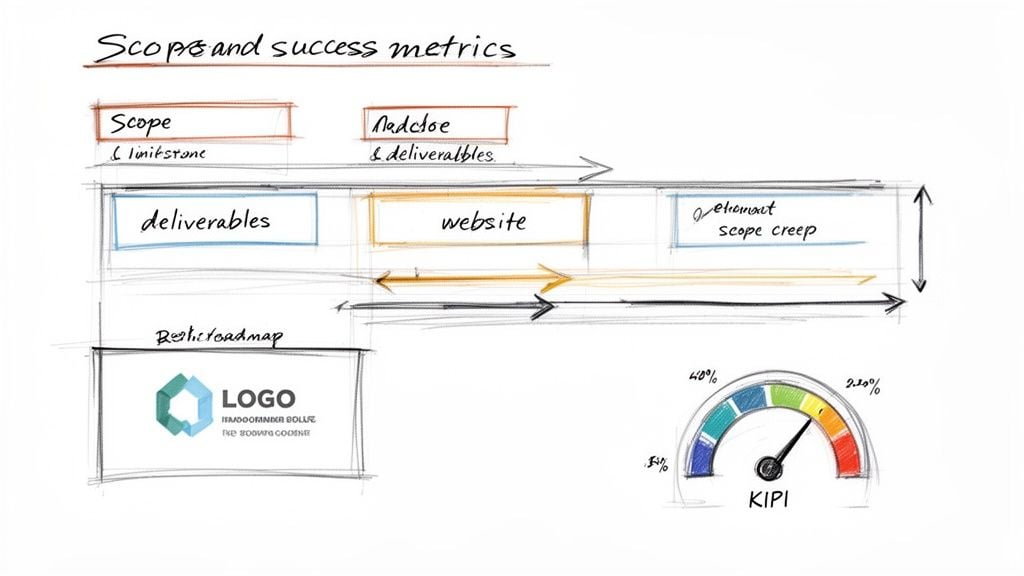
Alright, you've figured out why you’re starting this project and who you’re trying to reach. Now we get to the part that separates a decent brief from a great one: the nuts and bolts. This is where we pin down what exactly the agency will do, what you’ll get at the end, and how you’ll both know if it all worked.
Think of these details as the guardrails for your project. They keep everyone on track and prevent "scope creep"—that silent killer that slowly inflates budgets and pushes deadlines into the distance. Getting this right from the start means your agency can focus purely on building what you need, with no nasty surprises.
Pinpointing Your Project Scope
The project scope draws a clear line in the sand. It outlines exactly what's included in the project and, just as importantly, what isn't. Being explicit here is your best defence against misunderstandings later on.
A vague request like "we need a new website" is just a starting point, not a scope. A properly defined scope sounds much more concrete: "A five-page responsive WordPress website with a blog, contact form, and gallery. This project will not include e-commerce functionality or a client login area."
That level of clarity ensures everyone is playing in the same field from day one. If you’re unsure what’s possible, exploring the breadth of graphic design services available can help you decide what to include in your project.
Listing Concrete Deliverables
Deliverables are the tangible things the agency will hand over to you. This is no time for assumptions; being incredibly specific is the key to getting what you expect. This list becomes your final checklist, confirming everything has been completed as agreed.
Don't leave any room for interpretation. Your list should be detailed and actionable.
Here’s how you might break it down for different projects:
For a Website Redesign:
- Homepage Design: A complete mockup showing both desktop and mobile views.
- Internal Page Templates: Specific designs for a standard content page, contact page, and blog post layout.
- Functional WordPress Theme: A custom-built theme based on the approved designs.
- Content Migration: Transfer of up to 20 existing blog posts and 10 service pages from the old site.
- Training Session: A one-hour video call to walk you through updating the new website.
For a Branding Package:
- Primary Logo: Final versions in full colour, solid black, and solid white.
- Logo Files: Delivered in vector (AI, EPS) for scaling and raster (PNG, JPG) for web use.
- Brand Guidelines Document: A PDF detailing correct logo usage, your colour palette codes (CMYK, RGB, Hex), and typography rules.
- Business Card Design: A print-ready file for a standard-sized business card.
This approach strips out all the ambiguity, making sure you get exactly what you’ve paid for.
Defining What Success Looks Like
So, how will you know if this project was a success? A beautiful design is one thing, but a design that actively helps your business grow is what really matters. This is where Key Performance Indicators (KPIs) come into play—the measurable data that proves your new design is doing its job.
Linking design work to measurable outcomes is the most powerful part of a brief. It shifts the project from being an expense to an investment, one focused entirely on delivering a tangible return.
Your KPIs should tie directly back to the objectives you set earlier. If your goal was to generate more leads, a key KPI would be the number of form submissions. If it was to increase sales, you’d be tracking the conversion rate.
Get specific and set a clear target. For example:
- KPI: Increase newsletter sign-ups.
- Metric: A 15% increase in monthly email subscribers within three months of launch.
- KPI: Improve user engagement.
- Metric: Decrease the bounce rate on the homepage by 20%.
- KPI: Drive more phone enquiries.
- Metric: Achieve 25 more "click-to-call" actions per week from mobile users.
When you put these benchmarks in your brief, you give the design team a clear target. They can then make strategic decisions—like where to place a button or how to structure the checkout flow—that are optimised to hit your numbers. It makes the entire process smarter and more results-driven.
Getting Real About Your Budget and Timeline
Alright, let's tackle the two topics that can feel a bit awkward: money and deadlines. Being upfront about your budget and timeline isn't just a nice-to-have; it's the bedrock of a design brief that leads to brilliant work and a smooth partnership.
When an agency knows what you're prepared to invest, they can tailor a solution that gives you the biggest bang for your buck. It’s never about just finding the cheapest price, but about getting the absolute best value and results for your money.

Talking Money: How to Frame Your Budget
I get it. Many clients worry that if they name a number, the agency will simply find a way to spend all of it. But a good agency doesn't work that way. We use your budget as a critical guide to scope the project realistically from day one. A larger budget might mean we can explore custom animations or more complex integrations, whereas a tighter budget helps us focus every penny on the core, must-have features.
The best approach? Give a realistic range. It shows you've thought things through and gives the agency room to propose a solution that hits your goals without being boxed in. For example, saying your budget is between "£5,000 and £7,000" is infinitely more helpful than a vague "I don't really have a budget." If you're looking for wider context on this, it's worth learning how to create a marketing budget that works for you.
Being transparent with your budget empowers your design partner to act as a true consultant. They can recommend where to invest for maximum impact and where you can save, ensuring every pound spent pushes your business forward.
Remember, the initial quote is just one part of the equation. To get a feel for the long-term value of quality design, take a look at our guide on the hidden costs of cheap website design.
Setting a Timeline That Works
One of the most common pitfalls I see is underestimating how long good design actually takes. Rushing the process almost always leads to cut corners, unnecessary stress, and a final product that falls short. A solid timeline has to account for every stage, including something most people forget: your own team's time for providing feedback.
A typical website project isn't just a straight line from design to launch. It’s a process with distinct phases, each needing its own space to breathe.
Here’s what a realistic 8-week website project might look like:
- Week 1: Kickoff & Discovery
- This is where we hold initial meetings, lock in the brief, and collect all the assets and content we need from you.
- Weeks 2-3: Design & Revisions
- Our team gets to work creating the first design concepts for the key pages.
- You and your team review the designs and provide feedback. We typically plan for two rounds of revisions here.
- Weeks 4-6: Development
- Once you've signed off on the designs, our developers start turning them into a living, breathing website on a private staging server.
- Week 7: Content & Testing
- The final content is loaded in, and we put the site through its paces, testing it across different browsers and devices to iron out any bugs.
- Week 8: Final Review & Launch
- You give the final green light, and we push the button to take the site live. This is always followed by post-launch checks to ensure a smooth transition.
What this breakdown really shows is how vital your involvement is. If feedback or content is delayed on your end, the launch date will inevitably shift. By mapping out a clear schedule in your brief, you set a healthy pace from the start—one that allows for creativity, thoroughness, and a truly high-quality result.
Using Your Brief to Protect Your Brand's Future
We all know a good design brief is essential for getting the creative work you want. But it has another, often overlooked, job: it's your first line of defence in protecting your brand’s intellectual property (IP).
This document is so much more than a simple project plan. By carefully outlining your unique selling points, visual style, and business goals right from the start, you’re creating a concrete record. Think of it as a paper trail that can prove invaluable down the road.
Creating a Record for Long-Term Protection
Your design brief is like an early-stage evidence locker. For any business launching a new product or undergoing a rebrand, the brief is where you first put into words what makes your design truly yours. This initial record can seriously strengthen your case if you ever need to register a trademark or a formal design.
The brief explains the "why" behind your creative decisions, linking them directly to your commercial strategy and the audience you’re trying to reach. This detail helps prove your design isn't just a random assortment of colours and shapes, but a deliberate and unique business asset.
When you define what makes your brand distinct from day one, you’re doing more than just guiding a project. You’re building a foundational record that helps secure your creative investment for years to come.
Competition for a unique brand identity has never been tougher. In a recent year, the UK's Intellectual Property Office (IPO) saw a staggering 81,215 design applications, a jump of 20.6%. With thousands of opposition claims filed every year, a brief that spells out your unique assets isn't a 'nice-to-have'—it's essential. You can dig into these trends in the full report from the IP solicitors at Briffa.
Practical Steps to Bolster Your Brief
So, how do you turn a standard brief into a document that actively protects your brand? It’s about going beyond the basics and getting really specific about what makes you, you.
Here are a few things you should always include in your brief to fortify your IP from the very beginning:
- Pinpoint Your 'Secret Sauce': What is the one thing—a feature, function, or visual motif—that truly sets you apart? Maybe it’s a specific pattern, a unique part of your user interface, or a way of doing things nobody else has. Write it down.
- Detail Your Colour Palette: Don’t just say “we use blue and white.” Specify the exact colour codes (HEX, RGB, or CMYK) and briefly explain why those colours are strategically important for your brand.
- Define Your Tone of Voice: Describe the personality your brand's communication should have. Is it witty and informal, or authoritative and serious? This helps define your brand's character beyond just visuals.
- Show Your Differentiation: Make a note of where your design deliberately steers clear of competitors. This demonstrates conscious differentiation and helps avoid any confusion in the marketplace.
Taking these extra steps creates a powerful document. It not only leads to better design work but also serves as a crucial piece of evidence if you ever have to defend what makes your brand special. It’s how you ensure your creative investment is not just visually appealing, but legally secure.
A Few Final Questions on Writing a Design Brief
Even after mapping out the core sections, a few questions almost always pop up when clients are writing their first design brief. It's completely normal. Let's walk through some of the most common queries we hear, which should help you tie up any loose ends with confidence.
How Long Should a Design Brief Be?
This is the classic "how long is a piece of string?" question. The truth is, clarity always wins over page count. A good benchmark for something like a new brand identity or a website project is typically between 2-5 pages. That’s usually the sweet spot for providing a complete picture without creating a novel.
The real driver, though, is complexity. A quick job, like designing a new set of social media templates, might only need a single, focused page. On the other hand, a complex e-commerce site with custom integrations will naturally require a more detailed document to cover all the moving parts.
Don't fixate on a word count. Your goal is simply to answer all the questions your design partner might have before they even think to ask them. If you’ve managed that, your brief is the perfect length.
What If I Don’t Fully Know My Target Audience?
This is incredibly common, so don’t worry. The most important thing you can do is be upfront about it in the brief.
Start by describing what you do know. Detail your current customers and then sketch out who you believe your ‘ideal’ customer is. Even a rough outline is a fantastic starting point. A good agency won’t see this as a roadblock; they’ll see it as part of the project.
This often kicks off what we call a 'discovery phase'. We can take your initial thoughts and build on them with dedicated research, helping you sharpen those customer personas into a tool we can both use effectively.
Never let the quest for a perfect audience profile stop you from starting. A clear description of who you think you want to reach is more than enough for a creative team to get going.
Should I Include Examples of Designs I Like and Dislike?
Yes, one hundred percent. If you do only one thing from this guide, do this. Visual examples are a shortcut to understanding your taste and vision, conveying more in five minutes than pages of written description ever could.
To make this exercise really work, here’s what we suggest:
- Find 3-5 examples of design you love. This could be anything—a competitor's site, a brand's packaging, or even just the font on a menu you liked.
- Jot down why you like each one. Get specific. Is it the clean, minimalist feel? The bold use of colour? The way the site guides you from one page to the next?
- Then, find 1-2 examples of what you don't like. This is just as crucial. Explaining why something feels "too corporate," "cluttered," or "childish" sets clear boundaries. It helps the design team avoid entire creative routes that you already know aren't right for your brand.
This simple task saves so much back-and-forth and gets everyone aligned from day one.
My Budget Is Limited. Should I Still Write a Detailed Brief?
Absolutely. In fact, a tight budget makes a detailed brief even more valuable.
Writing everything down forces you to prioritise. It makes you clearly separate the absolute "must-haves" from the "nice-to-haves." This focus is gold for an agency. It allows us to get creative and propose smart solutions that give you the biggest bang for your buck.
We might suggest a phased approach, for example. We could launch with the essential features now and plan to add the extra bells and whistles in a second phase once you've started seeing a return.
Being transparent about your budget allows an agency to act as a true partner. We can find the best path forward within your means, ensuring every pound you spend delivers real value.
Ready to turn your vision into a reality but want a hand in getting your brief just right? At DesignStack, we specialise in working with businesses to translate their goals into beautiful, effective designs. Get in touch with us today to start the conversation about your next project.


Leave a Reply