
Equi Trek Parts: A UK Owner’s Complete Guide (2026)
You load the horse, do a last walk-round, and spot something that was not there last week. A seized ramp latch. A flickering lamp. A jockey wheel that suddenly feels rough and sloppy. That is how most equi trek parts searches begin in real life. Not from a tidy service schedule, but from a problem that has picked the worst possible moment.
The hard part is rarely just fitting the replacement. It is working out exactly what the trailer or horsebox needs, whether the part is suitable, and whether the job is safe to handle at home. With Equi-Trek, that gets harder when owners are dealing with model changes, dealer-only parts, poor online listings, and limited UK-specific guidance for local sourcing.
I see the same mistakes repeatedly. Owners buy by appearance alone. They assume one Sonic or Show Treka part matches another. They replace the obvious failed item but miss the underlying wear around it. Then the same fault comes back, or something worse follows.
This guide is built around what goes wrong on UK vehicles and trailers, what you can sensibly inspect yourself, and where you need to slow down and verify before spending money. It focuses on the parts that stop journeys, fail tests, or create safety risks first. Axles, bearings, ramps, hinges, lights, latches, gas struts, running gear, and the fittings around them.
Your Essential Guide to Equi Trek Parts
Equi-Trek owners often start with a simple question. “Where can I get this part?” That is usually the wrong first question.
The right question is, “What has failed?” A stiff ramp may need a latch, but it may also point to hinge wear, frame distortion, corrosion, or swelling around the fixing points. A noisy wheel is not automatically a bearing. It can be tyre damage, brake drag, hub contamination, or axle trouble.
That distinction matters because Equi-Trek parts are not one neat category. Some are straightforward service items. Others are body-specific, ramp-specific, or tied to a certain production run. Order too quickly and you can waste time, money, and in some cases create a dangerous mismatch.
What owners get wrong first
Most bad orders come from one of these habits:
- Buying from a photo only. Two lamp units can look nearly identical and still have different fitments, connectors, or mounting depths.
- Ignoring the chassis details. Model name alone is often not enough.
- Treating axle components as generic. Owners get caught out most badly when this occurs.
- Replacing one failed piece without checking the surrounding assembly. A new hinge on a weakened ramp edge is not a proper repair.
A Horse & Hound forum thread describes a Show Trekka owner dealing with axle failure after under 1000 miles and less than two years of use, despite regular servicing, which is exactly why I do not treat running gear faults casually (Horse & Hound discussion of the axle failure case).
Tip: If the failed part affects braking, wheel retention, towing stability, ramp integrity, or chassis strength, stop using the vehicle until you know what has failed.
The practical approach that works
For most owners, the cleanest process is this:
- Identify the exact part and the failed system
- Check whether it is universal, adapted, or model-specific
- Source from a supplier who can verify fitment
- Assess whether the job is safe for DIY
- Inspect related components before putting it back on the road
That approach saves more trouble than chasing the cheapest listing online.
How to Accurately Identify the Part You Need
Correct identification starts before you pick up a spanner. If you misidentify the part, every step after that gets more expensive.
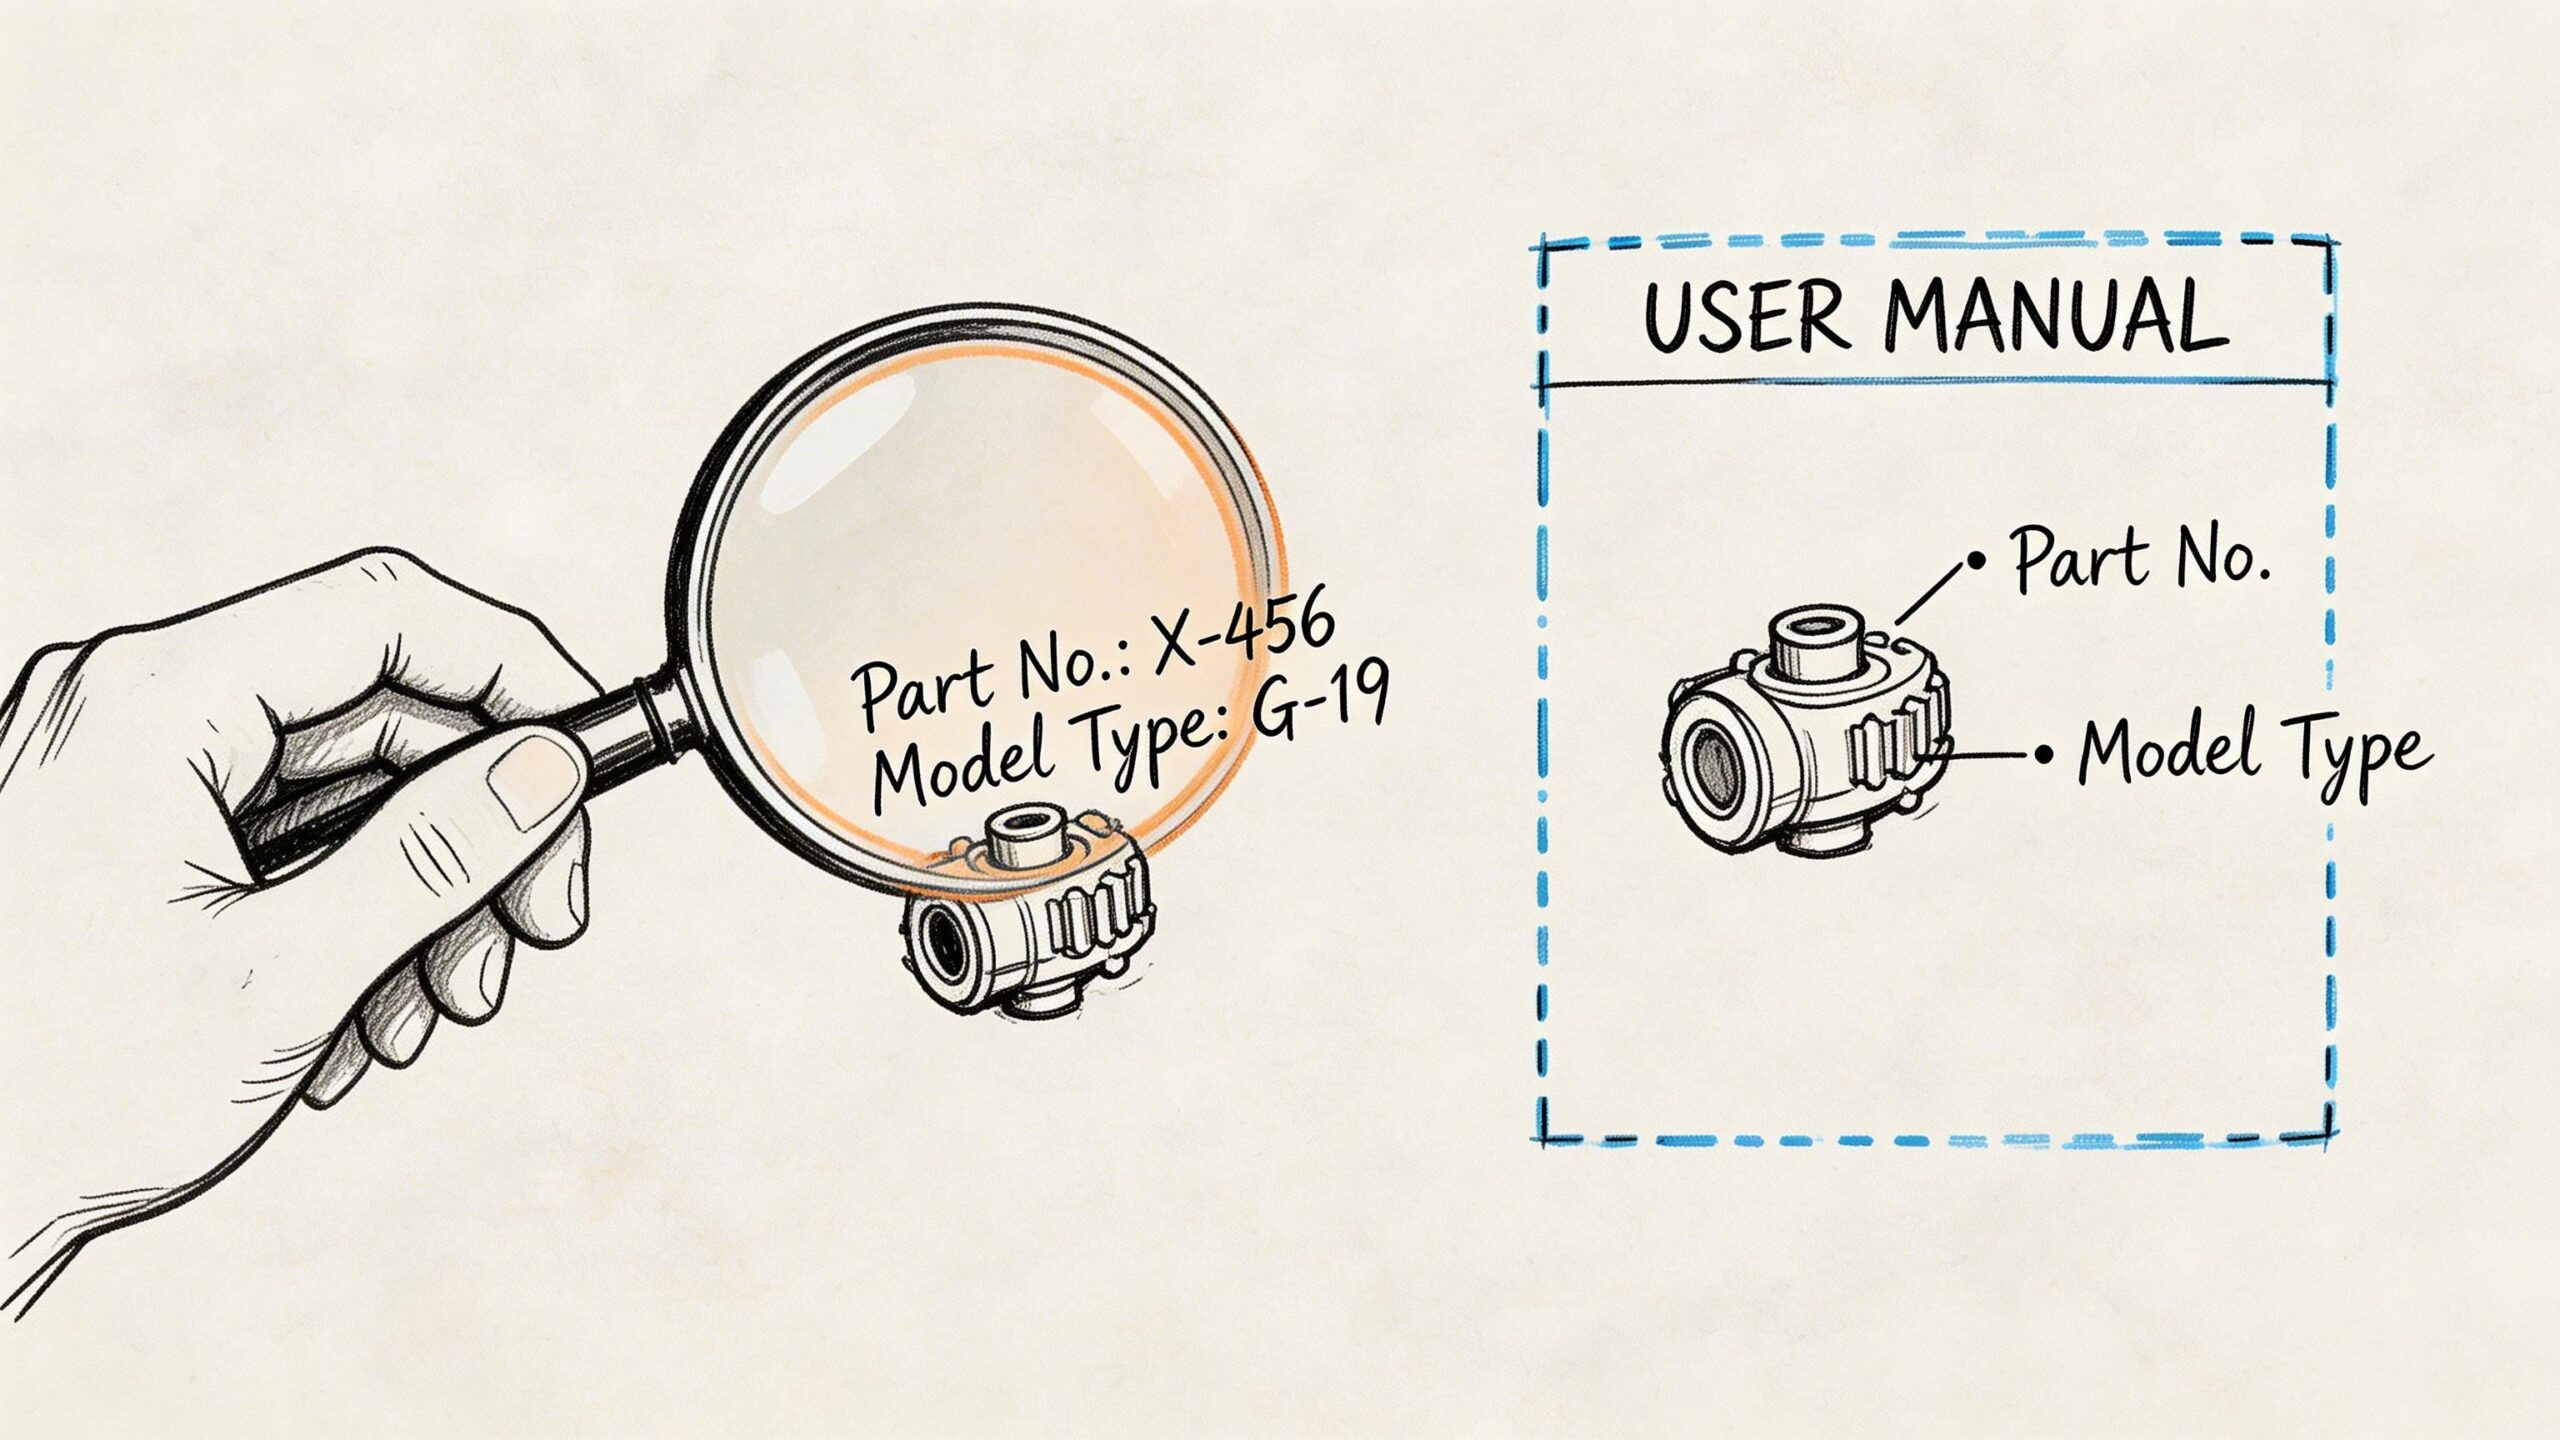
Start with the trailer or horsebox itself
Do not begin with a seller’s listing. Begin with the vehicle in front of you.
Check these first:
- Model name and body type. Sonic, Victory, Show Treka, Space Treka and similar names help, but they are only the start.
- Approximate build year. Even if you do not know the exact year, narrow it down.
- VIN and chassis plate details. These are far more reliable than memory.
- Photographs of the failed part in place. Take wide shots and close-ups.
- Measurements. Bolt centres, overall length, thread size, connector type, and mounting orientation matter.
If you are not sure where to look, this guide on how to locate your Equi-Trek's VIN number is useful before you contact any supplier.
Separate universal parts from Equi-Trek-specific parts
At this stage, owners either save themselves a lot of money or create a lot of grief.
A few parts are often closer to universal fitment, provided the dimensions and ratings match:
| Part type | Usually easier to cross-match | Needs caution |
|---|---|---|
| Light units | Yes | Connector style, mount shape, legal compliance |
| Jockey wheels | Often | Clamp diameter, load rating, bracket clearance |
| Gas struts | Sometimes | Force rating, end fittings, length |
| Latches and catches | Sometimes | Backing plate, handed fit, body clearance |
| Bearings and hubs | No assumption | Must match axle and hub specification |
| Ramp parts | Rarely | Structural fit, hinge geometry, support condition |
The mistake is assuming that because a part looks universal, it is safe to fit universally. Lights and latches are one thing. Running gear is another.
The axle and bearing check that owners skip
If there is one area where I want owners to slow down, it is axles, hubs, bearings, and related running gear.
The problem is not just wear. It is incomplete identification. A bearing set without verified axle and hub compatibility is not a repair strategy. It is a gamble.
The gap in owner guidance is obvious in practice. There is plenty of general trailer advice online, but far less UK-specific help on sourcing and replacing axle and wheel bearing components for Equi-Trek models, particularly when local suppliers do not publish clear compatibility lists.
Use this basic inspection routine before you order anything in that area:
- Jack safely and support properly. Never rely on the jockey wheel or a basic jack alone.
- Spin the wheel by hand. Listen for rumble, scrape, or uneven resistance.
- Check for play at the wheel. Grip top and bottom, then rock gently.
- Inspect hub temperature after a short move. A hot hub can point to trouble.
- Look for grease contamination or metal debris around the cap and brake area.
- Read every marking you can find on the hub, bearing, and axle assembly.
Key takeaway: On axles and bearings, the right part number matters more than the fastest delivery.
Diagnose the system, not just the failed piece
A failed lamp may be wiring. A broken ramp spring may be a symptom of hinge binding. A worn hinge pin may trace back to corrosion and misalignment.
When I inspect equi trek parts for replacement, I work outward from the failed item and ask:
- What else supports it?
- What caused it to fail?
- If I fit the new part today, what will overload it tomorrow?
That is especially important on doors, ramps, suspension-related parts, and towing gear. A visible break is often the end of the story, not the start.
Keep a parts record from now on
Once you identify a part properly, record it. Keep:
- VIN
- model
- year
- axle details
- supplier
- invoice
- part photos
- fitting date
That small record makes every future repair easier, especially when the same trailer changes hands or goes in for testing.
Sourcing and Ordering Authentic Equi Trek Parts in the UK
Once you know what you need, the next decision is where to buy it. Many owners either overpay for certainty or underpay for trouble at this point.
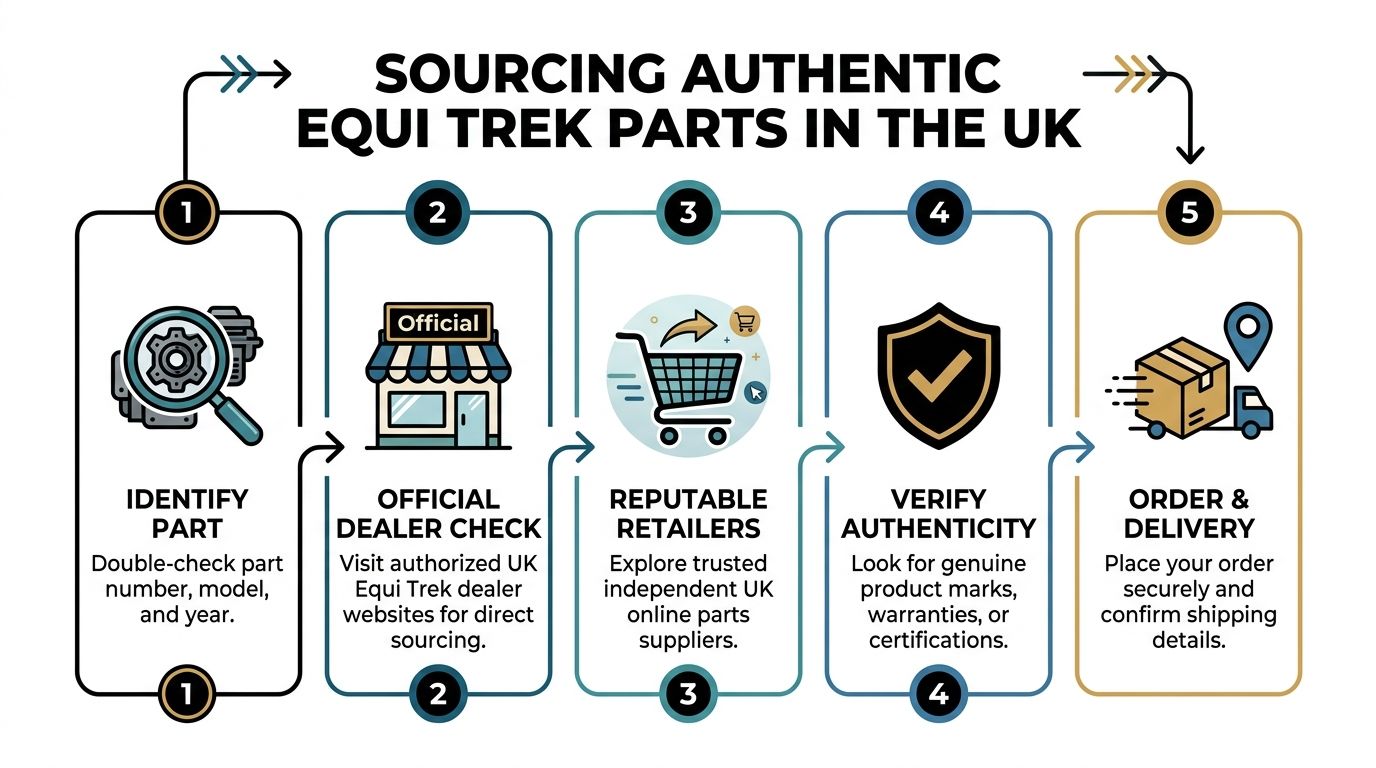
Official dealer versus independent supplier
There is no single right answer. It depends on the part.
Official dealer route
Best for body panels, trim pieces, branded fittings, ramp assemblies, and anything tied closely to a specific model build.
Pros:
- better chance of matching model-specific components
- clearer warranty trail
- less guesswork on obscure parts
Cons:
- lead times can be awkward
- some dealers want more information before they will confirm anything
- pricing is usually firmer
Independent trailer supplier route
Best for service items, some running gear components, lighting, fixings, and workshop consumables, but only if the supplier understands trailer compatibility properly.
Pros:
- often faster
- more flexible on cross-matching
- useful when you can provide dimensions and markings
Cons:
- quality varies sharply
- some sellers list “fits Equi-Trek” far too loosely
- returns become painful if you ordered by guesswork
The Dorset problem and why local sourcing can be awkward
Owners in places like Dorset often want to buy locally for speed, advice, and practical support. That makes sense. The problem is that local stockists do not always publish model-specific compatibility for Equi-Trek.
Toller Trailers in Dorset is described in the verified information as stocking extensive trailer parts as one of the largest South West suppliers, yet there are no online Equi-Trek-specific inventory lists or compatibility guides. In practice, that means local availability may exist, but owners still need to do the identification work before calling.
That is why your order enquiry needs to be sharp and complete.
What to send before you ask for a quote
Do not send a one-line message saying, “Need a ramp hinge for my Equi-Trek.”
Send this instead:
- VIN and model details
- Clear photos of the part fitted on the vehicle
- Close-up of any markings or labels
- Measurements
- Your suspected fault
- Whether left-hand or right-hand fitment applies
- Whether you need the part only or the full assembly
That gives a supplier something concrete to work with. It also quickly shows whether they know what they are talking about.
Red flags when buying online
The bad listings tend to have the same signs.
- No dimensions listed
- No mention of model compatibility limits
- Blurry catalogue images only
- No discussion of load rating or specification
- No returns clarity for fitted parts
- Language like “should fit most trailers” on safety-critical components
For hydraulic and assisted components such as damped mechanisms, lifts, or pressure-related fittings, a supplier who understands industrial-grade specifications is more useful than a generic marketplace seller. This practical guide to UK hydraulic equipment supply is worth reading because it shows the sort of specification-led approach you want when a part does more than bolt on.
What authenticity looks like in practice
Authenticity is not just branding on a box.
Check for:
- correct packaging and labels
- traceable supplier details
- specification sheets where relevant
- warranty or returns terms
- consistent finish and machining quality
- proper fasteners and included hardware, if the kit should contain them
If a part arrives with poor casting, rough holes, weak welds, or no paperwork at all, do not fit it just because the show is at the weekend.
Tip: A cheap non-critical trim part is one thing. A cheap suspension, coupling, axle, or ramp component is a false economy.
A simple ordering workflow that avoids most mistakes
I use a very plain workflow and it works well:
- Confirm the failed system
- Verify the part using VIN, photos, and measurements
- Ask one supplier to confirm fitment in writing
- Compare with one alternative source
- Order only once the part description matches your evidence
- Inspect the delivered part before booking fitting time
For owners managing repair costs and suppliers across different channels, organised admin helps more than people expect. Even simple structured tracking can stop duplicated orders, missing invoices, or forgotten follow-ups. This internal resource on https://designstack.co.uk/free-gbp-optimisation/ shows the value of a clearer digital process, even though the subject itself is broader than trailer parts.
Cost versus delay versus safety
The cheapest route is not always the most expensive mistake, but it often is.
If the part is cosmetic, trim-related, or easily reversible, there is room to shop around. If it affects towing, loading, ramp function, structural support, braking, or wheel retention, pay for confidence. A delayed trip is annoying. A roadside failure with a horse on board is much worse.
A Guide to DIY Installation and Critical Safety Checks
There are equi trek parts that a careful owner can fit. There are others that should never become a weekend experiment.
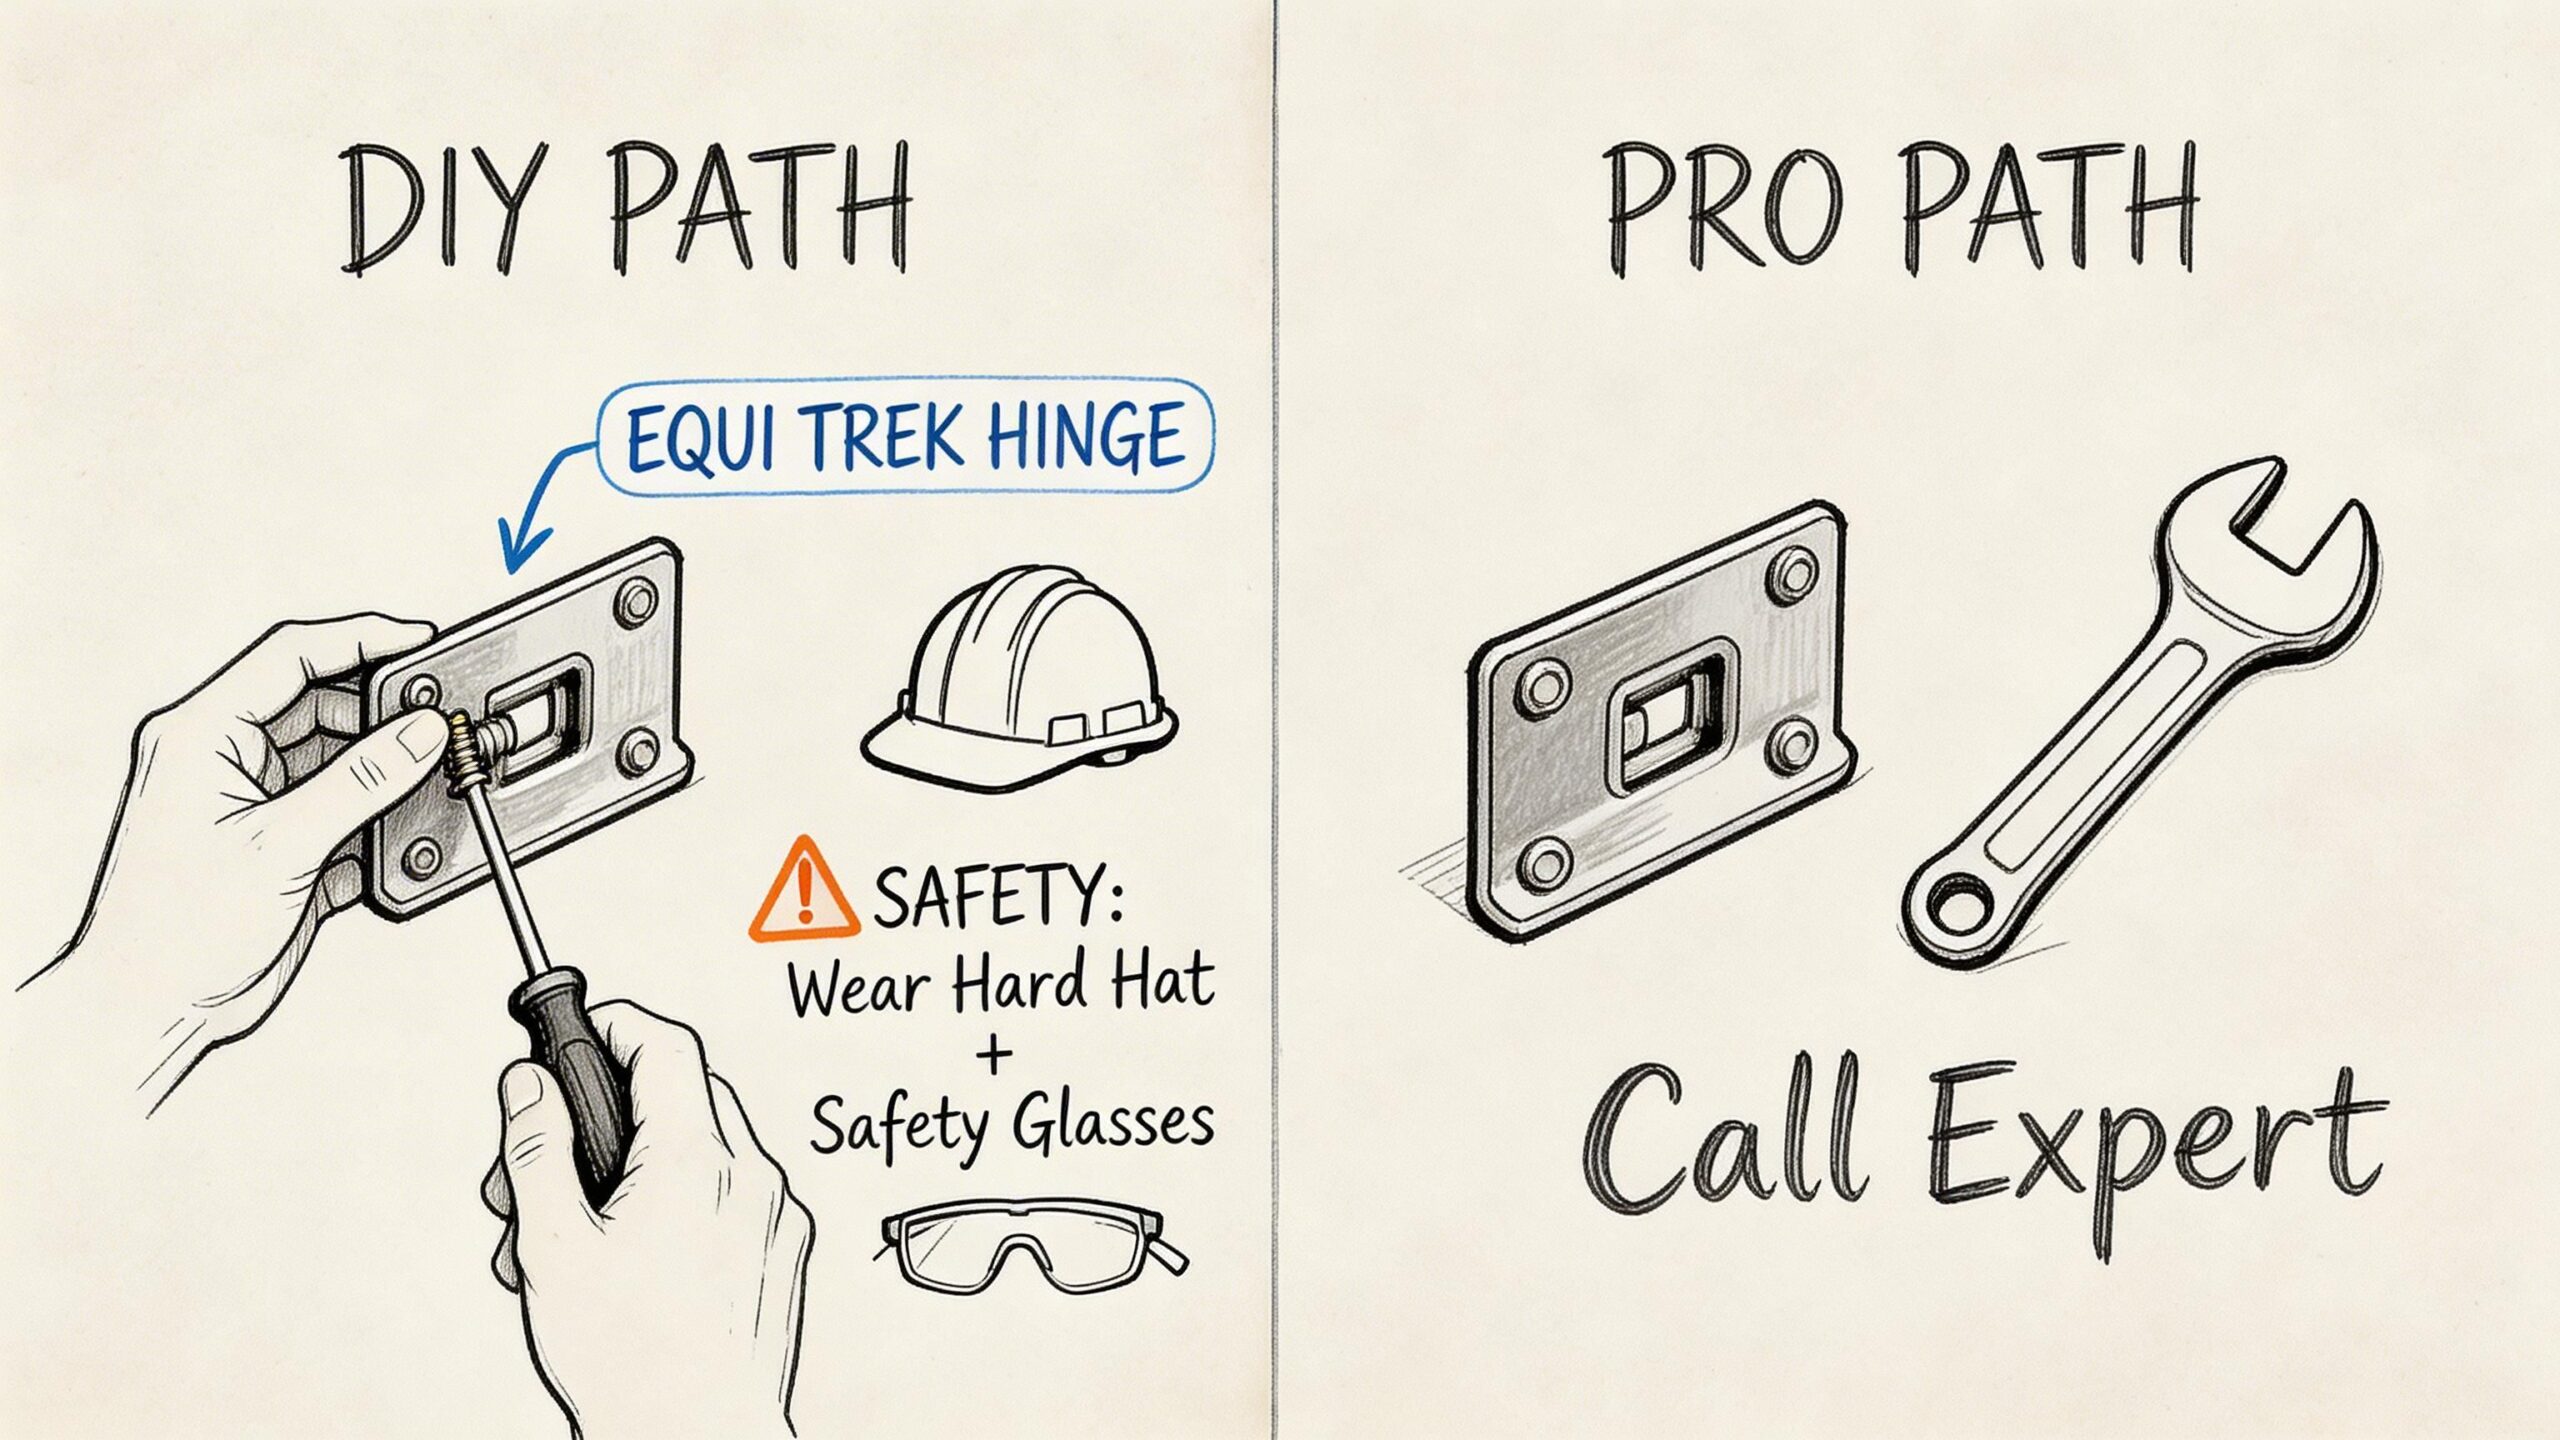
I am comfortable with owners replacing straightforward items if they work methodically. Lamps, some latches, gas struts, non-structural trims, and some jockey wheel assemblies can be reasonable DIY jobs. Brake work, axle work, structural ramp repairs, chassis issues, and anything that changes load-bearing behaviour are different.
Decide first whether the job is suitable for home
Ask these questions before starting:
- Is the part safety-critical when towing?
- Does removal affect structural integrity?
- Will the replacement need torque settings you can verify?
- Can you support the vehicle safely and legally while working?
- Do you know how to test the repair before using it with a horse on board?
If any answer is uncertain, that is your sign to stop.
A sensible DIY example
A lamp unit replacement is a good example of a reasonable owner job. It is visible, accessible, and testable.
The right sequence looks like this:
- Disconnect power where appropriate
- Photograph existing wiring before removal
- Check the mounting face for cracks or water ingress
- Clean the contact area
- Fit the new unit without forcing screws
- Test all functions
- Check cable routing so nothing chafes during travel
A gas strut is also manageable for some owners, but only if the replacement length, end fittings, and force rating are already verified. If the panel or locker lid is twisting, do not just fit stronger struts. Find out why the movement changed.
Ramp work needs more caution than owners expect
Ramps create a lot of false confidence because the failed part is often visible. A latch, spring, hinge cover, assist strut, or edge trim seems simple enough. Sometimes it is. Sometimes it is hiding a larger issue.
In the last 12 months, DVSA annual testing data for South West England revealed an 18% failure rate for horse trailer axles and ramps, often due to composite panel wear, according to the verified data provided with this brief and linked reference material (YouTube reference URL supplied in the brief). The same verified data also notes anecdotal Dorset engineer observations suggesting up to 30% of serviced trailers in coastal areas need ramp part replacements due to corrosion.
That fits what many coastal owners already suspect. Salt, damp air, poor drainage, and neglected fixings attack ramps from the edges inward.
Key takeaway: If a ramp part has failed, inspect the whole ramp assembly before ordering anything.
The post-fit safety checklist
Any part replacement should end with a proper check, not a quick “that looks alright”.
Use this checklist:
- Fasteners. Confirm every fixing is the correct type, seated properly, and tightened to the correct specification where one applies.
- Alignment. Doors, ramps, catches, and hinges must close without strain. If you have to force it, something is wrong.
- Movement. Open and close the part several times. Feel for graunching, twist, or uneven travel.
- Wiring. Make sure cables cannot rub, snag, or trap.
- Sharp edges. Horses find what you missed.
- Load path. If the part carries weight, check what supports it behind the visible face.
- Road test. For towing-related work, do a cautious empty run before transporting a horse.
- Recheck after use. Look again after the first journey.
Coastal checks for Dorset owners
If your Equi-Trek lives near Weymouth or elsewhere on the coast, pay extra attention to:
- hinge pins
- ramp edge frames
- fixings hidden behind trim
- latch plates
- underside protection
- trapped moisture points
Rinse alone is not enough if corrosion has started under seals or around dissimilar metals.
A useful visual reference can help if you are comparing a simple fitting task against a professional route. This video is worth watching before you decide how far to take the job yourself:
Tools that make DIY safer
Not glamorous. Just necessary.
| Tool | Why it matters |
|---|---|
| Axle stands | Safe support |
| Torque wrench | Correct tightening |
| Vernier or tape measure | Match dimensions properly |
| Trim tools | Remove panels without damage |
| Inspection lamp | Spot cracks and corrosion |
| Contact cleaner | Clean electrical connections |
| Marker pen and labels | Keep fittings organised |
A proper torque wrench is not optional when the fitting depends on clamping force. Guessing by feel is how wheels, couplings, and support components end up loose or damaged.
When a “simple” job turns into a workshop job
Stop and book it in if you find:
- elongated bolt holes
- cracked composite around a fixing point
- rust bleed from a hinge or bracket
- wheel play after a hub-related repair
- brake drag you cannot explain
- a ramp that no longer sits square in its aperture
Those are not finishing details. They are signs the failed part may have been the warning, not the problem itself.
Proactive Maintenance Tips to Extend Part Lifespan
Most expensive equi trek parts failures give warnings first. Owners miss them because they are busy, the trailer still seems usable, or the symptom appears small enough to ignore.
A decent maintenance routine is not complicated. It just needs to be regular and consistent.
The monthly walk-round
Once a month, or before any longer trip, check the following without rushing:
- Lights and plugs. Flicker, condensation, cracked lenses, dirty pins.
- Tyres and wheel area. Damage, odd wear, embedded debris, missing caps.
- Ramp operation. Listen for extra resistance or grinding.
- Hinges and catches. Free movement, even closure, no loose fixings.
- Floor and lower edges. Moisture traps, swelling, soft spots, impact damage.
- Windows and seals. Water ingress often starts small.
- Coupling and jockey wheel. Smooth operation matters when loading and hitching.
You are looking for change, not perfection. A part that worked smoothly last month but now needs force is telling you something.
The quarterly deeper check
Every few months, go further.
Clean, then inspect
Dirt hides cracks. Old grease hides wear. Wash the trailer or horsebox properly, let it dry, then inspect joints, edges, and underside areas with a lamp.
Lubricate the right points
Use suitable lubricant on moving metal components such as hinges, catches, coupling points, and other designed pivot areas. Do not drown everything. Over-lubrication attracts grit and can make diagnosis harder.
Check fixings for movement
Visible witness marks, shiny metal around bolt heads, or fretting dust can indicate movement in a joint that should be stable.
Tip: If you hear a new squeak, do not just spray it and forget it. Find the source first.
What UK conditions do to parts
Winter road salt, standing damp, and long periods of disuse do more damage than many owners expect. Trailers that sit outside often suffer more from inactivity than mileage.
Common UK-related trouble spots include:
- underside brackets
- rear ramp edges
- lamp connections
- sealant joints
- hidden steel fixings behind trim panels
If you wash after salty roads, pay attention to drying as well as cleaning. Moisture trapped behind rubber, trim, or sealant lines keeps corrosion active.
Warning signs worth acting on early
These are the ones I tell owners not to ignore:
- a wheel that feels hotter than the others
- a ramp that drops or lifts unevenly
- a latch that only works if you “jiggle” it
- a light fault that comes and goes
- water marks where there were none before
- fresh rust staining at a join or hinge
None of those guarantee major failure. All of them justify a closer look.
Keep a maintenance log
This sounds over-organised until it saves you.
Write down:
- inspection date
- what you checked
- what changed
- what needs ordering
- what was fitted
- when the next check is due
That record helps you spot patterns. It also helps any mechanic who sees the vehicle later.
When to Call a Professional and Who to Trust
A good owner does not prove competence by doing every job personally. A good owner knows where the red line sits.
For equi trek parts, the red line is clear. If the repair touches brakes, axles, hubs, chassis structure, ramp structure, towing gear, or load-bearing fixings, book it in.
The jobs that should not be guesswork
DIY stops being sensible when the repair can affect control, stopping distance, wheel retention, or the structural integrity of the loading area.
That includes:
- axle replacement
- bearing and hub work if compatibility is uncertain
- brake strip-down and adjustment if you are inexperienced
- ramp frame repairs
- chassis corrosion repair
- welding on structural members
Even if you can physically fit the part, that does not mean you can safely sign off the result.
What a trustworthy specialist looks like
A decent workshop should be willing to discuss:
- what they found
- what part they are fitting
- whether it is genuine, equivalent, or adapted
- whether other parts in the assembly show wear
- what they recommend checking next
You are looking for clarity, not sales talk.
A specialist trailer service centre with relevant trade credibility, including NTTA membership where applicable, is usually a stronger bet than a general garage with little experience in horse trailers and horseboxes.
Questions worth asking before you book
- Have you worked on this Equi-Trek model before?
- Will you inspect related components around the failed part?
- Can you confirm the fitted part details on the invoice?
- Are you able to advise on ramp and running gear condition, not just the single fault?
- What should I recheck after collection?
If the answers are vague, keep looking.
Build a relationship before you need recovery
Owners who wait until the trailer fails by the roadside often accept the first workshop with availability. That is understandable, but not ideal.
Find a local specialist before the urgent job arrives. If you want to see how a well-presented automotive service business communicates trust, clarity, and workmanship standards online, this example from https://designstack.co.uk/portfolio/vision-autoworks/ is a useful reference point for what transparent service presentation looks like.
The best workshop for you is not necessarily the closest. It is the one that understands horse transport risk and treats every repair as if a live load depends on it, because it does.
Keeping Your Equi-Trek Safe and Roadworthy
The best approach to equi trek parts is simple. Identify carefully, buy carefully, fit carefully, and inspect more than the failed item.
Most owner frustration comes from rushing one of those steps. They order by guesswork, trust a vague listing, or fit a part without checking what made it fail. That is how small faults become repeat faults.
Safe ownership in the UK also means thinking locally. Road conditions, storage conditions, coastal corrosion, supplier access, and testing expectations all shape what parts fail and how quickly they fail. What works for an inland trailer kept under cover may not work for one living outside near the sea.
If you keep records, inspect regularly, and draw a firm line around safety-critical DIY, your Equi-Trek will be far easier to live with. If you need a reminder that strong equestrian presentation matters as much as sound engineering, this example at https://designstack.co.uk/portfolio/coach-horses/ shows how the right support around a horse-focused business can look professional and dependable.
Keep the vehicle roadworthy before the diary gets busy. That is always cheaper than repairing it after the failure.
If your equestrian business needs a website, stronger branding, or a clearer online presence to match the professionalism you bring to your yard or workshop, DesignStack is a Dorset-based team worth speaking to. They build polished WordPress websites, eCommerce sites, branding, and digital systems with clear communication and fixed-cost pricing.


Leave a Reply