Essential Horse Trailer Accessory Upgrades
The awkward moment usually comes before sunrise.
You’ve packed haynets, travel boots, passports, headcollars, spare lead ropes, and your own flask. The horse is plaited or at least brushed enough to leave the yard with dignity. Then your mind starts running through the trailer itself. Are the tyres right. Is the jack usable. Will the camera connect. Have you got enough ventilation if traffic turns bad.
That quiet worry is why most owners start looking for a horse trailer accessory in the first place. Not because they want gadgets, but because they want fewer weak points.
A well-set-up trailer changes the whole feel of travel. Loading is calmer. Hitching is quicker. You can find what you need without emptying half the tack room onto the floor. Your horse also travels in a space built around welfare rather than bare minimum function.
The best upgrades work together. A fan matters more when your windows are sensibly managed. A camera is more useful when your horse is standing on sound flooring and your storage isn’t letting loose kit rattle about behind the breast bar. A hydraulic jack earns its keep when you’ve also packed the right wheel brace and know where the spare is.
Your Roadmap to a Safer, Smarter Horse Trailer
Most of us have learned trailer lessons the expensive way.
A missing tie ring, a useless torch, a seized coupling, a haynet hung too high, a grooming tote that tipped over and leaked coat spray into everything. None of these sounds dramatic on its own. Together, they turn a simple trip into a rushed, stressful one.
The trailers that travel best aren’t always the newest. They’re the ones that have been thought through properly. The owner has looked at each stage of a journey and asked a simple question. What tends to go wrong here, and what accessory fixes it?
Think in systems, not add-ons
That’s the shift that matters. Don’t buy one horse trailer accessory because it looks smart in a catalogue. Build a system around four jobs:
- Protect the horse in motion with ventilation, secure footing, and sensible monitoring
- Protect the tow and trailer unit with reliable jacking, visible lighting, and sound hitching gear
- Reduce human error with clear storage, labelled essentials, and easy-access tools
- Keep the setup maintainable so every added item can be checked, cleaned, and repaired without a fight
If an accessory doesn’t help one of those jobs, it probably isn’t worth your money.
Start with your real travel pattern
A local Riding Club member doing short trips needs a different setup from someone hauling to camp, hunting, or multi-day shows. One horse, two horses, young horse, seasoned traveller, pony who eats on the move, gelding who paws at partitions. Those details matter more than brand hype.
Good trailer upgrades solve a problem you already have. Poor ones create a new one, usually weight, clutter, or wiring trouble.
That’s how I’d approach any trailer, from an older Ifor Williams to a newer aluminium build. Sort the safety basics first. Then improve comfort. Then organise the human side of the journey. Then make sure every single addition can be maintained properly under UK conditions.
Safety First Critical Accessories for Secure Journeys
If a trailer isn’t safe, nothing else matters.
The legal and practical baseline in the UK is firmer than many owners realise. A key shift came with the 2015 Horse Trailer Code of Practice, which made items such as spare tyres and hydraulic jacks central to road readiness. It also tied accessory choice much more closely to incident prevention. According to data summarised by Double D Trailers, spare tyres were required in 95% of inspected trailers, and roadside incidents fell 22% from 2015 to 2024 after these standards took hold. The same source notes 120,000 active horse trailers in the UK in 2024, with trailer cameras in 50% of new purchases, linked to lower stress-related injuries during transport (Double D Trailers horse trailer accessories overview).

The essential accessories
Some upgrades are optional. These aren’t.
A usable spare wheel setup
Having a spare is one thing. Being able to access it on the roadside, with the correct wheel brace and a jack that works under load, is another. Test this at home on level ground. If the spare carrier is seized or the wheel nuts need a bar extension, sort that before you travel.
A hydraulic jack or electric-hydraulic combo
For most owners, this is a better long-term choice than a basic electric-only unit. The reason is simple. Mud, weather, uneven ground, and infrequent use are hard on electrical kit.
A camera system
A trailer camera does two jobs. It helps with reversing, and it tells you what your horse is doing when you can’t safely stop and check. For welfare, a horse-area camera is often more valuable than owners expect. You’ll spot scrambling, persistent pawing, repeated head tossing, or a haynet tied badly long before you arrive.
Bright, reliable exterior lighting
If your trailer still has dull or temperamental lamps, LED upgrades are worth serious thought. They improve visibility in poor weather and tend to be more dependable over time.
Wired vs wireless cameras
Owners often ask which is better. The honest answer is that both can work, but they fail in different ways.
| Camera type | Works best for | Main advantage | Main drawback |
|---|---|---|---|
| Wired | Frequent travel, permanent fit | Stable signal | More involved installation |
| Wireless | Simpler retrofits, occasional use | Easier to install | More prone to interference |
| Dual camera setup | Horses plus reversing | Covers welfare and manoeuvring | More cost and more wiring |
If you drive long distances or through signal-heavy areas, wired tends to be less frustrating. If you’re retrofitting an older trailer and want a cleaner first step, wireless can be sensible if the unit is properly mounted and tested before each journey.
Small hardware that prevents bigger trouble
A lot of roadside grief starts with overlooked basics.
- Breakaway cable: Replace frayed, kinked, or rusty cables. Don’t keep one just because it’s technically still attached.
- Safety chain and hitch lock: Check fit, wear, and ease of use. Cheap locks that jam in winter are false economy.
- Tyre pressure monitoring system: This is one of the better upgrades for owners doing regular mileage. A slow pressure drop can become a shredded tyre before the trailer starts to feel wrong from the cab.
- Reflective markings and clean light lenses: Not glamorous, but they improve visibility exactly when visibility is worst.
Practical rule: If an accessory only works in dry weather on your yard, it isn’t road-ready.
Safety decisions that pay off on a dark roadside
Think about a motorway puncture in rain. You want four things immediately. A stable place to stop, clear visibility, a jack you trust, and tools you can reach without unpacking the whole trailer. That’s why safety accessories shouldn’t be scattered through random lockers.
Keep them together. Label them. Practise using them.
A horse trailer accessory should reduce panic, not add to it. If fitting or carrying it makes a roadside problem harder to manage, choose something simpler and tougher.
Enhancing Horse Comfort and Wellbeing on the Road
Owners sometimes talk about comfort as though it sits below safety. It doesn’t.
A horse that stays cooler, stands more securely, and can lower its head to eat and clear its airways is usually a safer traveller. Calm horses load better, balance better, and arrive with less fatigue. That means fewer rushed unloads, fewer bad associations with the trailer, and less chance of travel becoming a recurring behavioural issue.
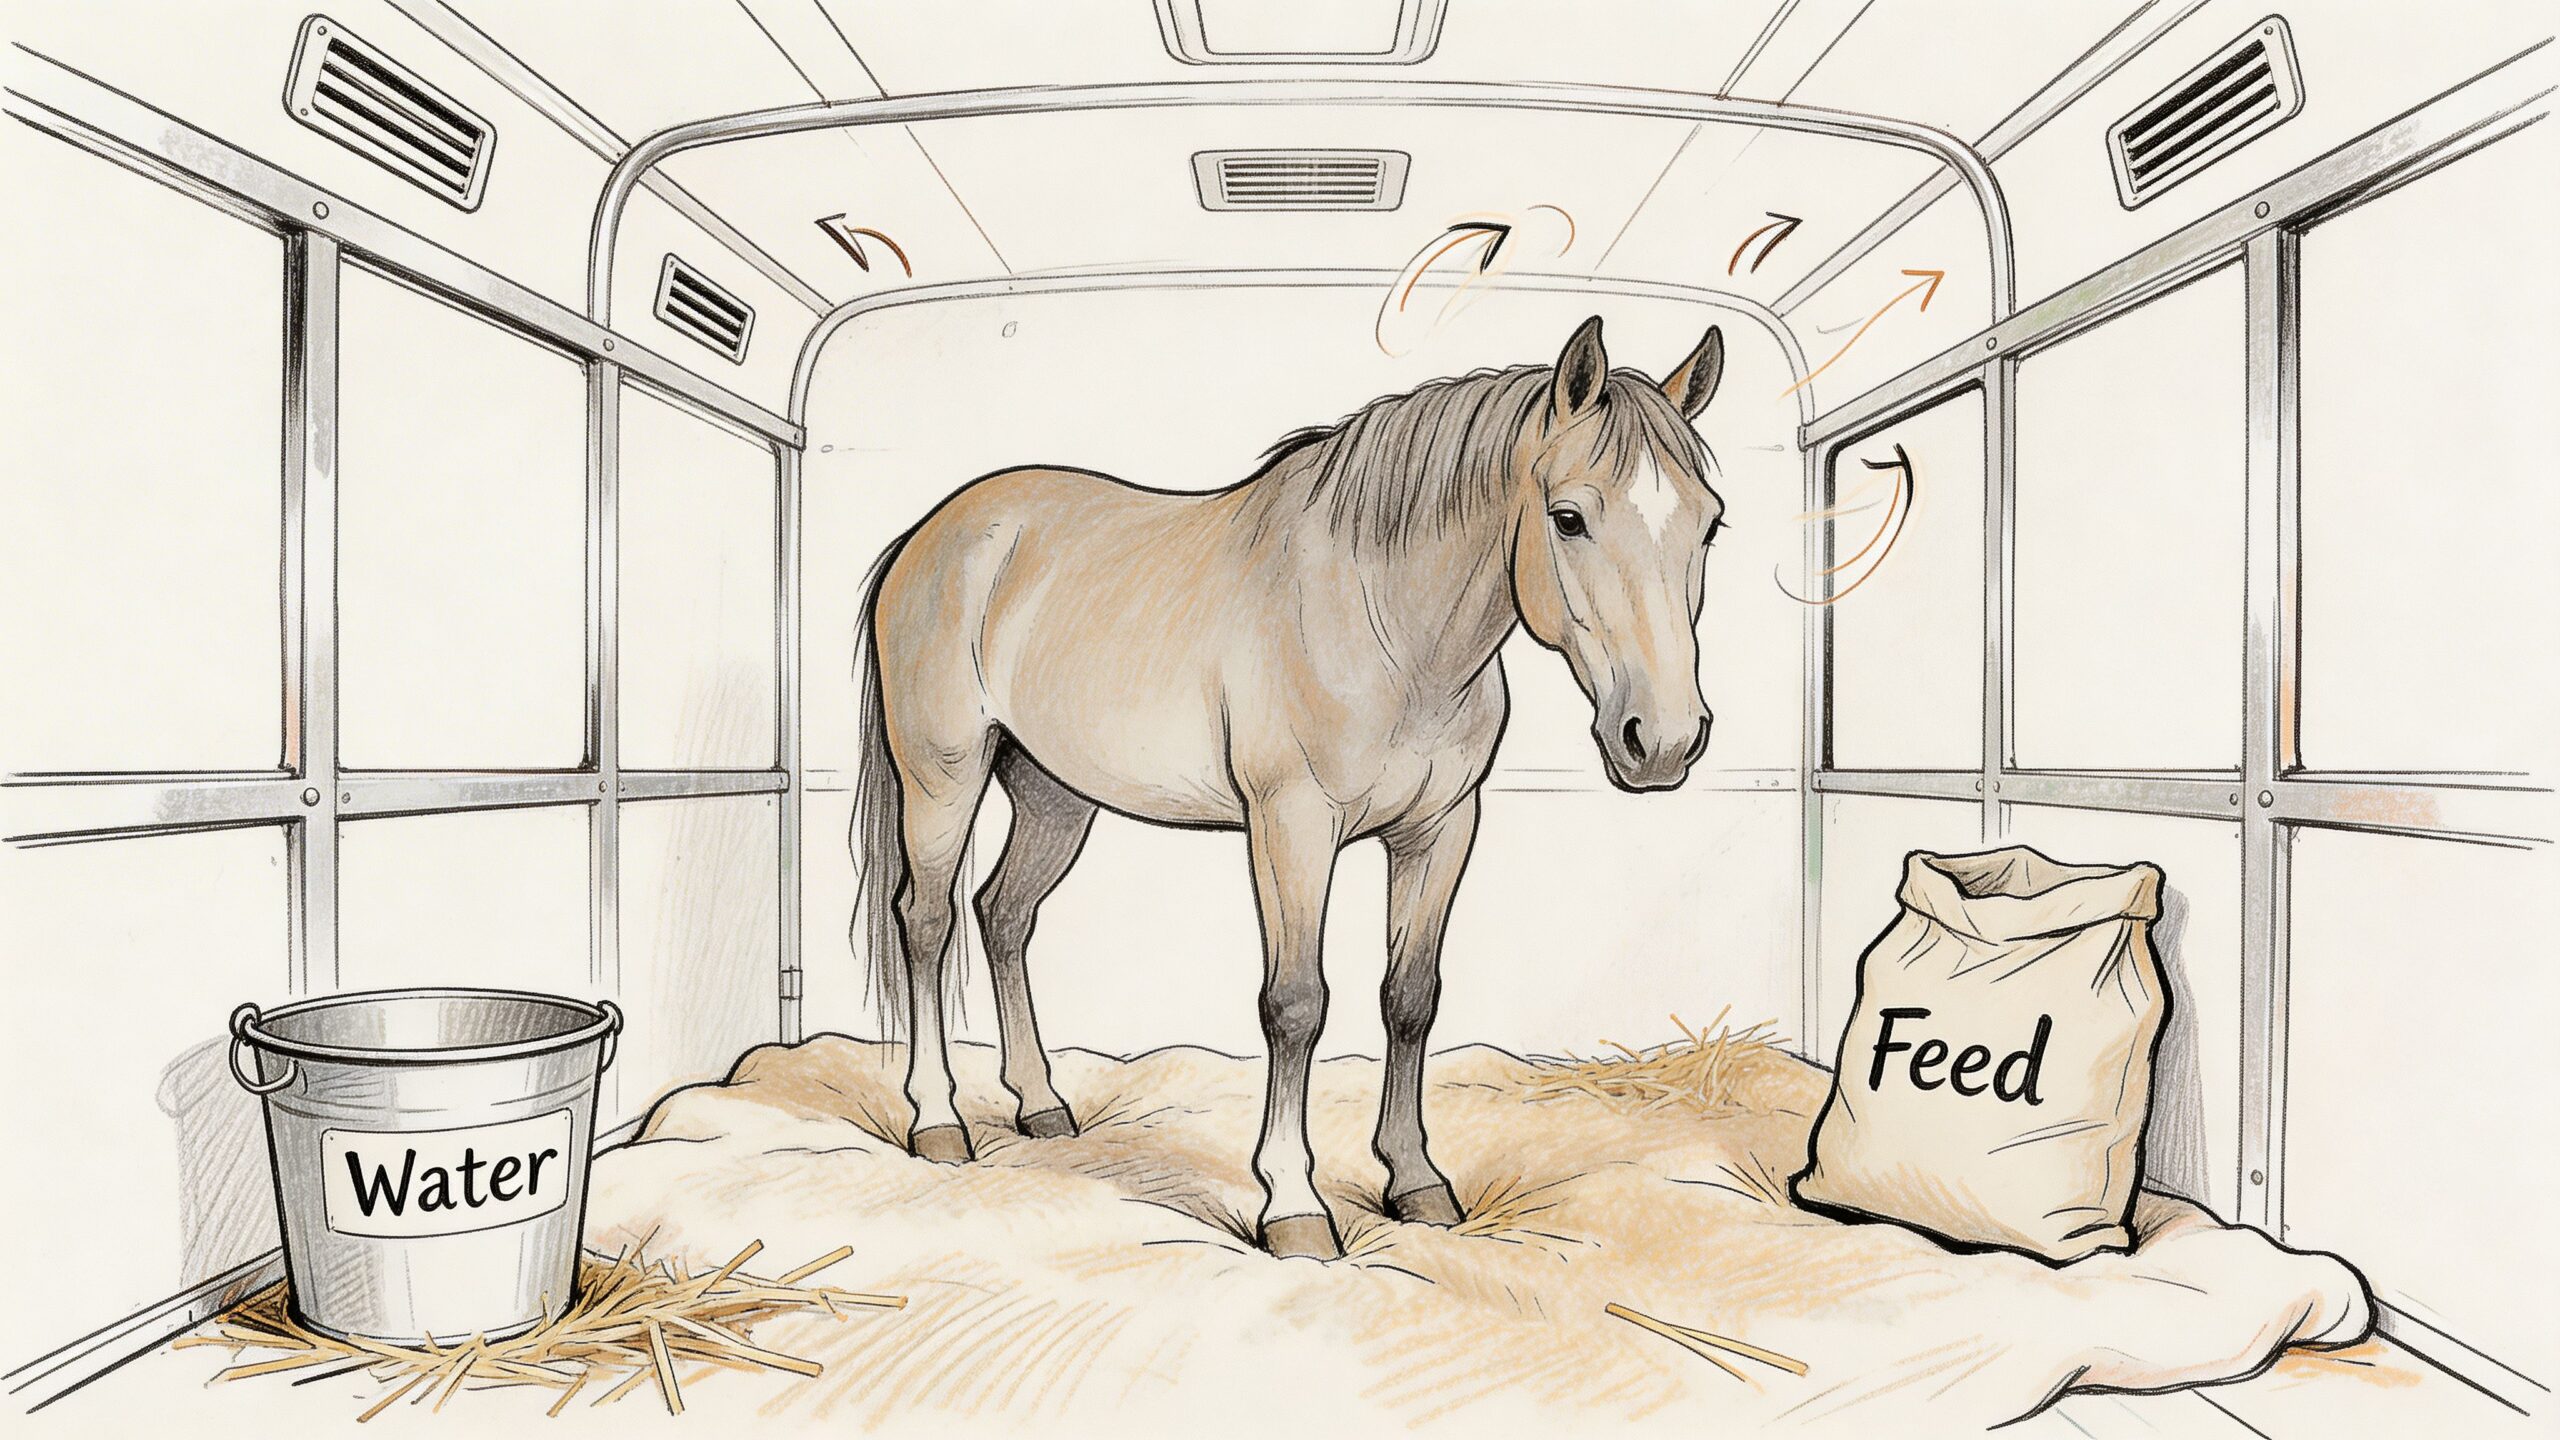
Ventilation is not just an open window
Many trailers technically have airflow. That doesn’t mean they have good airflow.
You want stale air moving out, fresh air moving in, and no setup that blasts directly into the horse’s face or leaves the interior hot and close when you’re standing still in traffic. Powered roof vents and properly fitted fans help because they keep air moving when road speed alone won’t do the job.
The welfare case for this is strong. The UK market data supplied for this brief notes that the 2007 Animal Welfare Act drove a 35% rise in ventilation accessory adoption, with recommendations such as one fan per stall, and linked that shift to a 28% reduction in heat stress incidents in BHS reporting (UK horse trailer market report summary).
Flooring and leg fatigue
Flooring changes how a horse feels after the trip.
Standard rubber mats can be perfectly serviceable if they fit tightly, drain well, and haven’t started curling at the edges. Where owners run into trouble is assuming all matting does the same job. Thin mats over a hard, vibrating floor can leave a horse bracing for balance over every bend and pothole.
Better flooring usually has three features:
- Grip without being abrasive
- Some shock absorption under load
- Easy lifting for cleaning and floor inspection
If you’re upgrading, think about your horse’s travel style. A seasoned cob who plants himself and leans into corners won’t place the same demands on the floor as a young warmblood who fidgets and shifts constantly.
Water and forage make a difference
The old habit of hauling without much thought for hydration still catches people out.
Onboard water systems, secure buckets, and practical slow-feeder haynets aren’t luxuries. They’re part of basic travel management. Horses lose moisture through breathing, sweat, and stress. If a horse won’t drink away from home, that’s more reason to make access easy and routine, not less.
A slow-feeder haynet can also help by keeping the horse occupied and encouraging a steadier posture. The key is safe hanging height and secure attachment. You want access without creating a tangle risk.
Comfort upgrades that work together
The best comfort setup is joined-up, not piecemeal.
| Need | Useful accessory | What it helps with |
|---|---|---|
| Heat and humidity | Roof vent or fan | Air movement when stationary or slow-moving |
| Fatigue on longer trips | Cushioned or anti-fatigue flooring | Less vibration and better footing |
| Hydration | Onboard water container or fitted water point | Easier routine access to water |
| Stress reduction | Safe haynet setup | Familiar forage and calmer travel behaviour |
One useful way to think about trailer design is to borrow ideas from stable planning. Good horse environments rely on airflow, safe surfaces, drainage, and practical daily use. That’s why owners who are planning wider equestrian facilities often get useful ideas from expert horse barn builders, because the same welfare logic applies inside a trailer on a smaller scale.
For a visual example of horse transport and turnout presentation in a working portfolio context, this coach horses project is worth a look.
Horses don’t need luxury in transit. They need a stable, breathable, predictable space.
If you only upgrade one comfort-related horse trailer accessory, start with airflow. If your floor is tired, make that the next spend. Those two choices change the travel experience more than most cosmetic add-ons ever will.
Smart Storage and Organisation for Stress-Free Travel
An untidy trailer is tiring before you’ve even left the yard.
You waste time looking for gloves, scissors, passports, tail bandages, baler twine, or the one spare lead rope that’s definitely in there somewhere. Then you arrive flustered, unload in a hurry, and realise half the tack room has shifted on the way.
That’s why storage isn’t about neatness for its own sake. It’s about speed, safety, and protecting expensive kit. In the UK, that priority is growing with use. Data supplied for this brief notes over 900,000 horses and 85,000 affiliated riders in 2024, roughly 150,000 registered horse trailers in 2023, and 25% annual growth in accessory sales. In Dorset alone, with 12,000 horses, local retailers reported 60% of trailer owners investing £500 or more each year in organisers, ties, and jacks, with hydraulic jacks lasting 3x longer than electric in those local reports (horse trailer market report summary).

Build storage by job, not by item type
The easiest system to live with is one that matches how you use the trailer.
Tack and turnout
- Saddle rack: Fixed racks are fine if space is generous. Swing-out racks are easier in cramped tack areas.
- Bridle hooks: Mount them high enough to avoid snagging, but not so high that you start yanking leather down awkwardly.
- Rug bar or rail: Better than stuffing damp sheets into a trunk where they’ll stay wet and stale.
- Boot tray: Useful for travel boots, brushing boots, and overreach boots that come off dirty.
Feed and grooming
- Lidded feed bins: Keep chaff, nuts, and supplements dry and contained.
- Grooming caddy: A removable caddy beats loose brushes every time.
- Spray storage: Bottles need upright storage or a sealed tote. Leaking coat products make a mess quickly.
- Water kit: Keep hoses, connectors, and buckets together.
If you also carry wash-down or disinfecting equipment for the trailer and ramp, practical guides on 12-volt sprayers can help you think through portable cleaning setups without wasting space.
Human gear and admin
This is the category most owners forget.
- Document wallet: Passports, membership cards, emergency contacts, and booking details in one weather-resistant place.
- Personal bag shelf or bin: Stops phones, keys, and gloves disappearing into feed sacks and numnahs.
- Boot change zone: Even a small tray by the tack room door cuts mud through the rest of the trailer.
- Snacks and flask shelf: Keep your own bits separate from horse supplies. It sounds obvious. It often isn’t.
A simple storage layout that works
Try this order from trailer door inward:
| Position | Best use |
|---|---|
| Nearest the door | First-aid kits, headcollars, lead ropes, gloves |
| Waist-height storage | Everyday tack and grooming kit |
| Upper hooks or rails | Bridles, jackets, lightweight rugs |
| Low secure bins | Feed, tools, spare parts, cleaning products |
This layout keeps heavy items lower and the most-used items easiest to grab.
Common storage mistakes
A lot of messy trailers share the same problems.
- Too many small containers: They look organised until you need something quickly.
- No labels: Fine when only one person packs. Useless when someone else helps.
- Heavy gear on high shelves: Bad for lifting, and bad if it shifts.
- No emergency access lane: You should be able to reach first-aid and roadside kit without moving saddles.
For a good example of branded vehicle and fit-out thinking, this Kustom Vans portfolio piece shows how layout and usability shape the overall experience of a mobile workspace. The principle translates well to trailers.
If you have to unpack five things to reach one thing, your storage system is failing.
The best horse trailer accessory in this category is often the least glamorous. A solid hook rail. A proper bin. A saddle rack mounted at the right height. These are the details that make departure calmer and arrival far less frantic.
A Practical Guide to Installing Your Trailer Accessories
Buying accessories is easy. Fitting them properly is where most owners either save themselves years of trouble or create it.
I’m all for competent DIY. Plenty of jobs are manageable if you’re careful, use the right hardware, and understand what sits behind the panel you’re drilling into. But trailers are working vehicles. Bad fittings loosen, leak, rust, rattle, or pull out under stress.

Electrical work
Fans, cameras, interior lights, and charging points all sound straightforward until they start draining batteries or failing in wet weather.
Before fitting any electrical horse trailer accessory, check three things:
Power source
Decide whether the accessory will run from the trailer system, an auxiliary battery, or only while connected to the tow vehicle.Cable route
Avoid sharp edges, moving parts, ramp hinges, and areas that collect water or bedding dust.Protection
Use proper connectors, suitable fusing, and secure cable clips. Loose wiring doesn’t stay safe for long in a trailer.
Battery drain is a common issue with cameras and fans. If the system can stay live while parked, build in a clear isolation point or switch. Otherwise, people forget, and a flat battery becomes part of the routine.
Structural fittings
Hooks, racks, organisers, and brackets look light in the shop. Under travel vibration and repeated use, they pull far harder than expected.
Mount into structure, not just panelling. If you’re fitting a saddle rack or heavy locker, find the frame members or approved fixing points. Thin wall panels won’t hold meaningful weight for long, especially with leather tack bouncing against them on rough roads.
Use backing plates where needed. Spread the load. Don’t rely on short screws in soft material and hope for the best.
Measure twice, drill once.
That sounds obvious, however, discipline involves checking inside and outside the panel before you start. You’re looking for wiring, frame members, skin thickness, and whether the fixing will interfere with doors, partitions, or windows.
Waterproofing
Well-executed tidy installs are durable installs.
Any new hole through the trailer body needs proper sealing. Without it, water gets into panel joins, insulation voids, timber elements, or fixings. Then you get staining, corrosion, rot, or electrical faults that appear months later and are miserable to trace.
Use sealant suited to vehicle or exterior bodywork. Clean the surface first. Tighten fittings evenly. Then inspect the seal after the first few trips and again after bad weather.
A quick waterproofing checklist
- Clean the drilling area so sealant adheres properly
- Deburr the hole to prevent cable or seal damage
- Prime exposed metal if needed to reduce corrosion risk
- Seal under the fitting and around the entry point
- Recheck after use because some fittings settle slightly
When to do it yourself and when to hire a fitter
DIY is usually reasonable for:
- hook rails
- lightweight organisers
- removable bins
- simple saddle racks
- non-structural tack room fittings
Bring in a professional for:
- brake-related work
- major electrical additions
- body penetrations for multiple accessories
- heavy structural mounts
- anything that affects balance, weight, or towing behaviour
If you’re considering a more design-led fit-out or custom vehicle interior work, this Vision Autoworks project is a useful reminder that clean installation is as much about planning as parts.
A clean install should look boring. No dangling wire. No rough edges. No mystery switch that only works if you wiggle it. That’s the standard worth aiming for.
Ongoing Maintenance and UK Legal Compliance
Accessories don’t stay safe because they were expensive. They stay safe because somebody checks them.
This is the part owners skip when a new horse trailer accessory goes in and works perfectly for the first few outings. Then months pass. Mud gets into connectors. A fan starts sounding rough. A bracket loosens. A water line picks up dirt. A camera image flickers only when it rains.
That decline is usually gradual, which makes it easy to ignore until the day you really need the kit.
A maintenance rhythm that’s realistic
You don’t need a workshop spreadsheet worthy of an HGV fleet. You do need a routine that catches wear early.
Before travel
- Test powered accessories: Switch on fans, lights, pumps, and cameras before loading.
- Check mounts by hand: Grab racks, hooks, and brackets. If they move, fix them before the road does it for you.
- Inspect cables and plugs: Look for rubbing, cracks, and damp contamination.
- Clear ventilation paths: Bedding, dust, and hay fluff can block vents quickly.
Monthly
- Lift and inspect floor mats: Moisture and trapped dirt hide underneath.
- Clean fan housings and vent edges: Airflow drops when blades and grilles clog.
- Flush water containers or lines: Stale water systems aren’t kind to horses or pumps.
- Review storage load: Owners add gear over time. Weight creeps up without notice.
Seasonally or annually
| Item | What to look for | Action |
|---|---|---|
| Lighting and camera seals | Cracks, moisture ingress, dim output | Reseal or replace |
| Jacks and moving hardware | Corrosion, stiffness, unreliable lift | Service, lubricate, or replace |
| Rubber flooring | Curling edges, wear spots, trapped damp | Refit or renew |
| Organisers and racks | Elongated holes, loose fixings | Reinforce or remount |
A trailer accessory that can’t be cleaned or checked properly will become a maintenance nuisance sooner than you think.
Weight, balance, and staying legal
Every added item changes something.
A fan may add little on its own. A water system, battery, tack box, extra flooring, tool kit, and storage hardware together can become significant. Owners often focus on towing capacity and forget trailer balance, nose weight, and the practical effect of loading heavy accessories high or to one side.
The safest habit is to treat every permanent addition as part of the trailer’s working setup, not as invisible weight. Keep a written record of what you’ve added. If you’re making substantial changes, get the trailer weighed and check whether any plating or compliance considerations apply for your model and use.
Solar accessories are no longer niche
One of the more useful developments in recent UK trailering is the move toward solar-powered support systems. The verified data for this brief notes 15% growth in UK trailer solar accessory sales in 2025, rising from 4,200 to 4,830 units, with 37% of 850 surveyed UK horse owners in January 2026 seeking solar fans or water pumps. It also states that RVC 2025 findings linked solar systems to a 25% reduction in overheating risk in humid conditions (horse trailer accessory upgrade article).
That matters because UK conditions aren’t the same as dry-climate advice you often see online. Humidity, stop-start traffic, and trailers standing at events can make passive airflow less effective than owners expect.
Solar isn’t a magic fix. Compatibility still matters, especially where owners are mixing older 12V setups with newer charging or battery arrangements. But for low-draw accessories such as fans or water pumps, it can reduce battery stress and make the trailer more self-sufficient when parked.
Keep the maintenance burden sensible
The sweet spot is a trailer that’s better equipped without becoming fiddly.
If an accessory needs constant tinkering, special workarounds, or a long reset ritual every time the weather changes, it’s probably the wrong choice for a horse owner who just wants to travel safely. Durable, checkable, weather-tolerant kit almost always wins over clever kit.
Frequently Asked Questions About Horse Trailer Accessories
How do I calculate trailer weight after adding accessories?
Use the trailer’s existing plate information and keep a written list of every permanent addition. Include fitted items such as water systems, batteries, racks, extra flooring, and storage hardware. Then get the trailer weighed if the changes are substantial. That’s the only reliable way to know where you stand legally and practically.
Are stick-on battery cameras a good alternative to wired systems?
Sometimes, but they’re a compromise.
They can work for occasional use or temporary setups, especially if you can’t justify a full wired install yet. The weak points are adhesive failure, battery management, and signal inconsistency. For regular road work, a properly mounted system is usually the better long-term option.
What’s the best accessory for a horse that paws or kicks during travel?
Start by asking why the horse is doing it.
Don’t assume one product will fix the behaviour. Look first at ventilation, footing, partition fit, driving style, travel companion choice, and whether the horse has enough room to balance. Protective padding can help prevent knocks, and a camera helps you understand the pattern, but the accessory only supports the core solution.
Can I fit accessories to a hired or rented trailer?
Only if the owner gives clear permission, and even then I’d avoid permanent changes.
For hired trailers, stick to removable items such as portable organisers, clip-on storage, your own haynet arrangement, and temporary camera systems that don’t require drilling. Anything electrical or structural should be left alone unless the provider approves it in writing.
What’s the first horse trailer accessory I should buy on a limited budget?
Buy the thing that removes the biggest safety gap.
For one owner that’s a proper jack and spare-wheel setup. For another it’s a camera, better internal airflow, or secure storage for roadside kit. Don’t choose based on what looks impressive. Choose based on what would most improve the next real journey you’re about to make.
Do I need every upgrade people recommend online?
No.
A lot of online advice is written for different roads, climates, trailer designs, and legal expectations. UK owners need to be more selective. Build a setup that suits your horse, your mileage, your trailer, and your maintenance habits. A simpler system that works every time beats a long list of add-ons that only work in theory.
If your equestrian business, yard, retailer site, or transport service needs a stronger online presence, DesignStack is a Dorset digital agency worth considering. They create websites, branding, and digital assets that help businesses present themselves clearly and professionally, which matters just as much online as a well-organised trailer does on the road.


Leave a Reply